


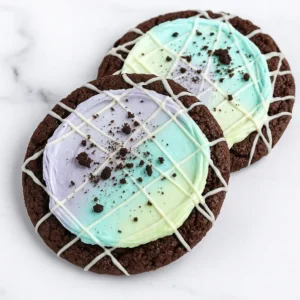
The moonbeam ice cream cookie is everywhere: thick chocolate cookies topped with bright fruity ribbons. It looks like a galaxy and tastes like fudgy base, cool fluff, and tangy-sweet swirls. Here’s a mobile-friendly recipe you can bake tonight, plus pro tips to nail the pastel swirls and that “ice cream” vibe.
If you’re into the backstory and flavor pairing, don’t miss my cookie deep-dive here: Crumbl Moonbeam Cookie. It’s a perfect companion read and makes an amazing side-by-side dessert plate.
What is a Moonbeam Ice Cream Cookie?
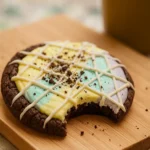
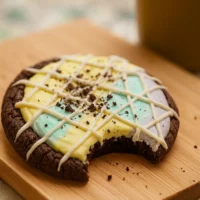
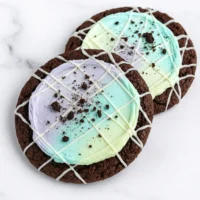
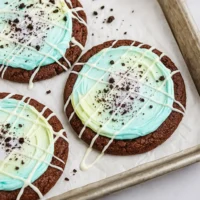
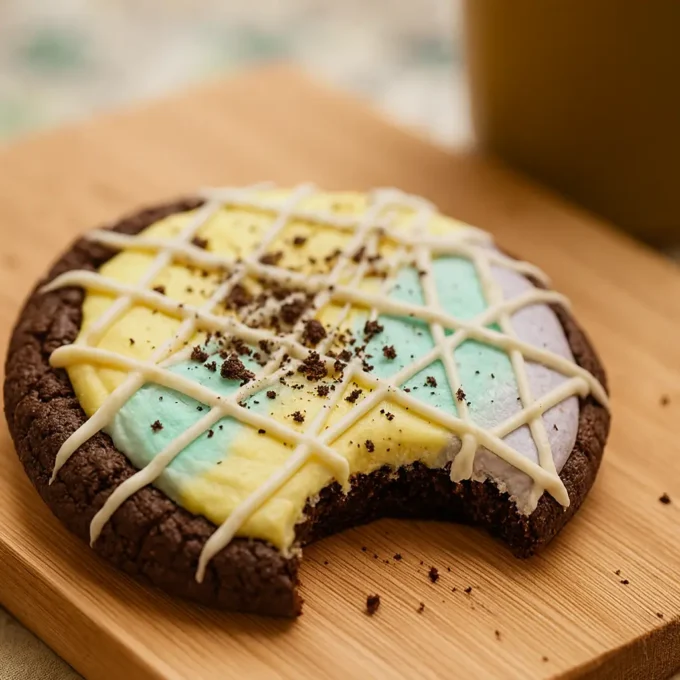
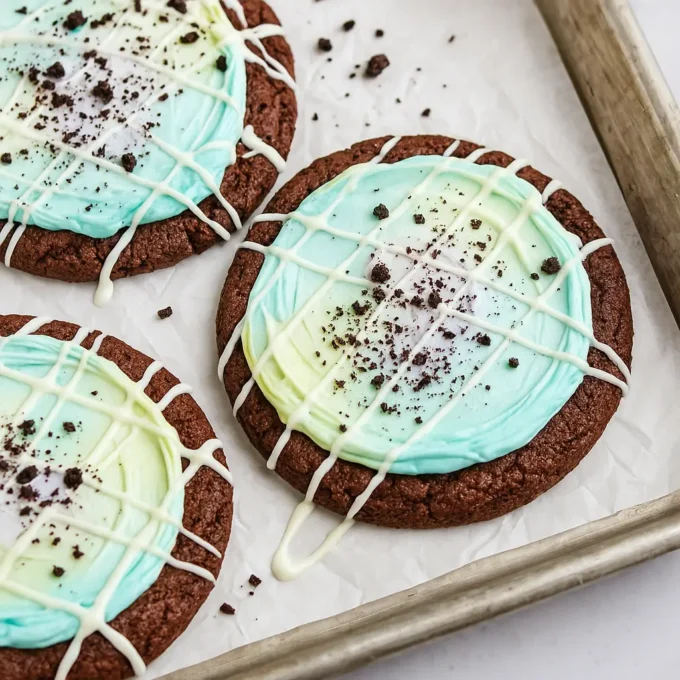
A moonbeam ice cream cookie starts with a soft, cocoa-rich cookie that stays thick and chewy. Once cooled, each cookie gets a velvety spread of marshmallow fluff, then artistic drizzles of berry preserves and lemon curd, finished with glossy white chocolate and crunchy cookie crumbs. There’s no literal ice cream in the base recipe—the toppings create a cool “ice cream” effect in taste and look—but I’ll share serving ideas with a scoop for the full experience.
Why people love it:
- Texture contrast: fudgy center, silky fluff and crisp crumbs
- Flavor balance: cocoa cookie, berry brightness, lemon zing and vanilla white chocolate sweetness
- Pastel visuals: swirled ribbons you can style a dozen ways
Moonbeam Ice Cream Cookie Ingredients

For the Cookie Dough
- 1 ½ cups all-purpose flour
- ½ cup unsweetened cocoa powder
- ½ tsp baking soda
- ¼ tsp salt
- ½ cup unsalted butter, softened
- ½ cup granulated sugar
- ½ cup brown sugar, packed
- 1 egg
- 1 tsp vanilla extract
- 1 cup cookies-and-cream pieces (crushed Oreo or similar)
For the Toppings
- ½ cup marshmallow fluff
- ¼ cup berry preserves (blueberry or strawberry work best)
- ¼ cup lemon curd
- ⅓ cup white chocolate, melted
- Cookies-and-cream crumbs, for garnish
This moonbeam ice cream cookie keeps the base fudgy and the topping bright. Chill briefly before decorating for cleaner swirls.
Equipment You’ll Need
- Hand mixer or stand mixer
- Two mixing bowls (dry/wet) + a small bowl for toppings
- Baking sheet + parchment paper or a silicone baking mat
- Wire rack for cooling
- Piping bag or small zip-top bag (for marshmallow fluff)
- Small spoon or squeeze bottle (for preserves, lemon curd, and chocolate)
Parchment vs silicone: Parchment can give a slightly crisper bottom; silicone mats encourage more even spread. Pick the finish you prefer.
Step-by-Step Instructions
Make the Cookie Dough
- Preheat the oven to 350°F (175°C). Line a baking sheet with parchment.
- In a medium bowl, whisk flour, cocoa, baking soda, and salt until uniform.
- In a separate large bowl, beat softened butter with both sugars for about 2 minutes until lighter and creamy.
- Mix in the egg and vanilla until fully combined.
- Add the dry mix to the wet in two additions, mixing just until a soft dough forms.
- Fold in the cookies-and-cream pieces so they’re evenly dispersed.
Shape & Bake
- Scoop about 2 tablespoons of dough per cookie and roll into balls. Arrange on the tray with room to spread.
- Gently flatten each dough ball so it bakes into a thick round.
- Bake 10–12 minutes until the edges are set and the tops lose their shine.
- Transfer to a wire rack and let the cookies cool completely (they firm as they cool).
Prep the Toppings
- Warm the berry preserves and lemon curd slightly so they drizzle easily.
- Melt white chocolate in short bursts in the microwave (15-second intervals), stirring until smooth.
- Load marshmallow fluff into a piping bag or small zip-top bag for easy spreading.
Decorate
- Spread a thin blanket of marshmallow fluff on each cooled cookie.
- Drizzle warmed berry preserves and lemon curd over the fluff to create colorful ribbons.
- Finish with a white-chocolate drizzle and a sprinkle of cookie crumbs for crunch and contrast.
Notes & Tips
- Chill if sticky: If the dough feels tacky, chill it for 30 minutes before scooping.
- Color control: Want a stronger pastel look? Choose a deep-purple berry preserve and a vivid lemon curd.
- Clean swirls: A toothpick or skewer lets you drag the preserves and curd into “nebula” patterns without over-mixing.
- White chocolate polish: Drizzle in thin ribbons for bakery-style shine.
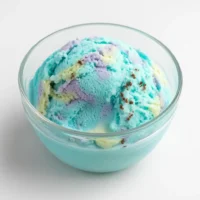
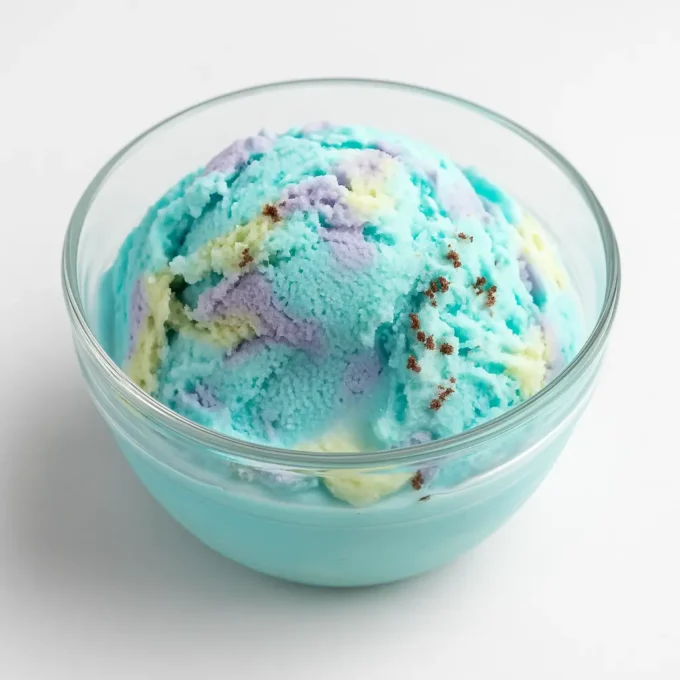
Tip: For the same creamy swirl you see here, follow the Moonbeam Ice Cream Recipe and use it as your topping.
Technique helpers:
- If you’re new to creaming butter/sugar or whipping to precise textures, this visual guide to peaks is handy when you tackle toppings that need aeration.
→ Visual guide to whipping peaks - Curious about color safety? The FDA explains how food colorings are approved and used in consumer foods.
→ FDA on color additives
Mistakes to Avoid
- Rushing the cool-down: Warm cookies melt marshmallow fluff. Always cool fully before topping.
- Overbaking: Pull when the tops turn matte and edges are set—centers should stay soft.
- Messy drizzle: Warm preserves/curd in 5- to 10-second bursts—too hot and they run; too thick and they glob.
- Thick chocolate clumps: Melt white chocolate gently and stir between bursts for a smooth ribbon.
You can air-fry a moonbeam ice cream cookie, but for a dozen even, thick cookies, a convection oven is my pick. Convection gives steadier air movement and a more uniform set, especially with cocoa doughs that can bake “darker” before you notice doneness. If you air-fry:
- Chill the dough balls well so they hold shape
- Bake smaller batches (2–4 cookies per round)
- Check early; many air fryers run hot
- Use perforated parchment or a compact mat so the bottoms don’t scorch
Specialty & Premium Ingredients
- Dutch-process cocoa for deep color and smoother chocolate notes
- European-style butter (higher butterfat) for a richer crumb
- High-quality white chocolate for glossy drizzle (couverture melts beautifully)
- Fine flake sea salt to finish—just a pinch makes flavors pop
If you’re comparing gear: a stand mixer is a lifetime tool for bakers; a good hand mixer works perfectly if you’re building your kitchen slowly.
What to Serve with Moonbeam Ice Cream Cookies
- A cool scoop on the side (vanilla bean, cookies-and-cream, or a fruity swirl)
- Coffee or espresso for contrast—bitterness offsets the sweet
- Fruity teas (raspberry, lemon balm) to echo the toppings
- Party platter: line a tray with frosted cookies and place small bowls of extra drizzle and crumbs so guests can customize
Storage & Make-Ahead
- Room temp (same day): Best texture within a few hours of decorating.
- Refrigerator: Chill 20–30 minutes before serving if you want that “cool ice cream” vibe. Store up to 2–3 days in an airtight box, layers separated with parchment.
- Freeze (undecorated cookies): Up to 2 months. Thaw, then decorate fresh for the cleanest swirls.
Estimated Nutritional Values
- Calories: ~460–520
- Fat: ~22–26 g
- Carbohydrates: ~60–68 g
- Sugar: ~38–45 g
- Protein: ~5–6 g
- Sodium: ~140–190 mg
Disclaimer: Nutrition is a good-faith estimate. Actual results vary by brands and quantities.
Frequent Asked Questions
What exactly is a moonbeam ice cream cookie?
A thick cocoa cookie topped with marshmallow fluff, swirls of berry preserves and lemon curd, glossy white-chocolate drizzle, and cookie crumbs—styled to taste and look like an ice-cream-inspired cookie.
Do I need special coloring to get the “moonbeam” look?
No—your color comes from berry preserves and lemon curd. Choose vivid varieties for pastel pop. For general color guidance, see the FDA’s color additive overview for consumer foods.
Can I make moonbeam ice cream cookies ahead for a party?
Yes. Bake the cookies a day ahead, store airtight, and decorate a few hours before serving. Chill briefly to lock in the swirls.
What gear makes the biggest difference?
A stand mixer speeds up creaming and gives fluffier results, but a hand mixer works well. Parchment is great for crisper edges; silicone mats for even spread.
Moonbeam Ice Cream Cookie

Equipment
- Hand mixer or stand mixer
- Two mixing bowls
- Small bowl for toppings
- Baking Sheet
- Parchment paper or silicone baking mat
- Wire rack
- Piping bag or zip-top bag
- Spoon or squeeze bottle
Ingredients
Cookie Dough
- 1 ½ cups all-purpose flour
- 1/2 cup unsweetened cocoa powder
- 1/2 tsp baking soda
- 1/4 tsp salt
- 1/2 cup unsalted butter softened
- 1/2 cup granulated sugar
- 1/2 cup brown sugar packed
- 1 egg
- 1 tsp vanilla extract
- 1 cup cookies-and-cream pieces crushed Oreo or similar
Toppings
- 1/2 cup marshmallow fluff
- 1/4 cup berry preserves blueberry or strawberry
- 1/4 cup lemon curd
- 1/3 cup white chocolate melted
- cookies-and-cream crumbs for garnish
Instructions
- Preheat the oven to 350°F (175°C). Line a baking sheet with parchment paper.
- In a medium bowl, whisk together the flour, cocoa powder, baking soda, and salt.
- In a large bowl, cream the butter, granulated sugar, and brown sugar until light and fluffy (about 2 minutes).
- Beat in the egg and vanilla extract until well combined.
- Gradually mix in the dry ingredients until a soft dough forms. Fold in crushed cookies-and-cream pieces.
- Scoop 2 tablespoons of dough per cookie, roll into balls, and place on the tray. Gently flatten each ball.
- Bake for 10–12 minutes until the edges are set and the tops look matte. Cool completely on a wire rack.
- Warm the berry preserves and lemon curd slightly for easy drizzling. Melt white chocolate in 15-second bursts, stirring until smooth.
- Spread marshmallow fluff over each cooled cookie. Drizzle berry preserves and lemon curd in ribbons. Finish with white chocolate drizzle and cookie crumbs.
Notes
I love how a moonbeam ice cream cookie turns simple pantry steps into something show-stopping. The fudgy base, the cool marshmallow layer, and those lemon-berry ribbons hit every craving without feeling heavy. Bake a batch, chill a few for that “ice cream” vibe, and play with the swirls until you find your signature look.
If you make these, drop a rating and a comment with your swirl pattern and toppings. Tried blueberry instead of strawberry? Added a pinch of flaky salt? I want to hear it.





2 Comments